Fudgy Keto Chocolate Peanut Butter Marshmallow Squares
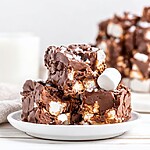
These decadent, no-bake squares combine the nostalgia of homemade marshmallows with a rich chocolate-peanut butter fudge coating. They offer a satisfyingly chewy texture and a sweet-salty finish without the added sugar, making them a perfect treat for low-carb lifestyles.
- Prep Time: 35 minutes
- Chilling Time: 8 hours (divided)
- Cook Time: 15 minutes
- Total Time: 8 hours 50 minutes
- Yield: 16 bars 1x
- Category: Dessert
- Method: No-Bake / Stovetop
- Cuisine: American
Ingredients
Scale
For the Marshmallows:
- 1 cup cold water (divided usage) (240 ml)
- 3 tablespoons unflavored gelatin powder (approx. 3 packets) (21 g)
- 2 cups granular allulose sweetener (reduced for better consistency) (approx. 320 g)
- 1/2 teaspoon kosher salt (3 g)
- 1 1/2 tablespoons pure vanilla extract (22 ml)
- 1/2 cup powdered sweetener (such as powdered erythritol or monk fruit blend), for dusting (60 g)
For the Chocolate Coating:
- 1/2 cup unsalted butter (cut into cubes) (113 g)
- 1 cup creamy peanut butter (no added sugar) (250 g)
- 2 cups sugar-free milk or dark chocolate chips (340 g)
- 1 teaspoon coconut oil (5 ml) OR 1/8 teaspoon liquid sunflower lecithin
- 1 teaspoon flaky sea salt (optional, for finishing) (5 g)
Instructions
- Bloom the gelatin: In the bowl of a stand mixer fitted with the whisk attachment, combine the gelatin powder with 1/2 cup (120 ml) of the cold water. Whisk briefly by hand to combine, then let it sit undisturbed for about 5 to 10 minutes while you prepare the syrup. The mixture will become firm and rubbery.
- Boil the syrup: In a medium saucepan over medium heat, combine the allulose, kosher salt, and the remaining 1/2 cup (120 ml) of water. Stir gently only until dissolved. Once the mixture begins to boil, stop stirring completely and do not touch the sides of the pan (agitation can cause crystallization). Insert a candy thermometer and cook steadily until it registers exactly between 235°F and 240°F.
- No-Thermometer Test: Drop a small amount of syrup into a cup of very cold water; it should form a soft, flexible ball that flattens slightly when removed from the water.
- Whip the marshmallows: Turn the stand mixer on low speed to break up the bloomed gelatin. CAUTION: The syrup is extremely hot and can cause severe burns. Very carefully pour the hot syrup in a slow, steady stream strictly down the inner side of the bowl (avoiding the whisk to prevent splattering). Once all syrup is added, gradually increase speed to high. Whip for 10–12 minutes.
- Doneness Test: Stop the mixer and lift the whisk; the peak should remain upright and stiff without slumping or flowing for at least 10 full seconds. Add vanilla in the last minute.
- Set the marshmallow slab: Prepare an 8×8 or 9×9 inch square pan by lining it with parchment paper and lightly greasing it. (Note: An 8×8 pan yields thicker marshmallows, while a 9×9 pan yields slightly thinner bars). Dust the bottom generously with powdered sweetener. Transfer the sticky marshmallow fluff into the pan, using a greased spatula to smooth the top. Dust the surface with more powdered sweetener. Refrigerate for at least 6 hours, or ideally overnight, until firm and springy.
- Cut into cubes: Dust a cutting board generously with powdered sweetener. Run a butter knife around the edges of the pan to release the slab, then turn it out onto the board. Using a sharp knife or pizza cutter coated in powdered sweetener, slice the slab into small, bite-sized mini marshmallows (approx. 1/2 inch cubes). Toss them in a large bowl with a little extra powdered sweetener to coat all sticky sides, then set aside.
- Melt the chocolate coating: Line the same square pan used earlier with fresh parchment paper, leaving an overhang on the sides. In a large heat-proof bowl set over a pot of barely simmering water (double boiler method), combine the unsalted butter, peanut butter, sugar-free chocolate chips, and coconut oil (or lecithin). Stir constantly until completely smooth and melted. Sensory cue: The mixture should be glossy, fluid, and emulsified.
- Cool, combine, and chill: Remove the chocolate mixture from heat and let it cool for 5–8 minutes, stirring occasionally. It should be lukewarm to the touch (not hot), or it will melt the marshmallows. Pour the cooled chocolate over the mini marshmallows. Fold gently but quickly until thoroughly coated. Pour into the prepared pan, spread evenly, and sprinkle with flaky sea salt if desired.
- Final set: Refrigerate the bars for 2 hours, or until the chocolate is completely set and hard. Lift the block out using the parchment paper handles. Place on a cutting board and slice into 16 equal squares.
Notes
- Allergy Alert: Contains dairy (butter) and peanuts. Ensure your chocolate chips are certified gluten-free if necessary.
- Why it works: Allulose is uniquely suited for marshmallows as it mimics the boiling properties of sugar without crystallizing upon cooling. The added fat (coconut oil/lecithin) ensures the chocolate coating remains stable and shiny without separating.
- Key Success Warning: Temperature matters. Do not rush the cooling of the chocolate mixture in step 7; if it is too hot, the marshmallows will dissolve into a gooey mess. Additionally, use extreme caution when pouring the hot syrup.
- Storage: Keep these bars refrigerated in an airtight container to maintain the snap of the chocolate and the chew of the marshmallow.
Nutrition Facts (1 square, 16 servings): Calories: 240 | Total Fat: 22 g (Saturated Fat: 11 g) | Total Carbs: 36 g (Fiber: 6 g, Sugars: 2 g, Allulose/Sugar Alcohol: 28 g, Net Carbs: 2 g) | Protein: 7 g
These values are approximate and may vary based on ingredients and preparation.
Find it online: https://recipes.alfityan.org/2019/12/22/no-bake-rocky-road-bars/