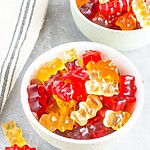
Perfect 3-Ingredient Keto Gummy Bears
These chewy, vibrant gummies are the ultimate low-carb hack for satisfying a candy craving. Using just three simple pantry staples, you can create a sugar-free treat that rivals store-bought versions. For an American twist, try the optional “sour dust” coating to mimic classic sour patch candies without the carbs.
- Total Time35 minutes
- Yield2 servings 1x
Ingredients
Scale
- 2 envelopes unflavored gelatin powder (Knox or similar) (approx. 14g)
- 1 package (0.3 oz) sugar-free flavored gelatin mix (such as Jell-O brand, any flavor) (approx. 8.5g)
- 1/3 cup water (brought to a rolling boil) (80 ml)
- 1/4 tsp citric acid or vitamin C powder (Optional: adds a sour kick)
Instructions
- Prepare the molds: Place your silicone gummy bear molds on a stiff baking sheet or cutting board. This ensures you can move them to the refrigerator without spilling once filled.
- Combine dry ingredients: In a small heat-proof mixing bowl, whisk together the unflavored gelatin powder and the sugar-free flavored gelatin mix. Tip: Whisking the dry powders together first prevents clumps from forming when the water is added.
- Dissolve gelatin: Pour the boiling water directly over the powder mixture. Whisk vigorously and continuously for about 1-2 minutes until the granules are completely dissolved and the liquid is clear. If the mixture creates foam on top, let it sit for a minute and skim the foam off with a spoon for clearer gummies.
- Fill molds: Using a liquid dropper or a pipette, carefully transfer the hot mixture into the mold cavities. Work relatively quickly, as the high gelatin content causes the mixture to set faster than regular Jello.
- Chill and set: Transfer the baking sheet with the molds to the refrigerator. Allow them to set for at least 30 to 40 minutes.
- Unmold and serve: Once firm, pop the gummies out of the molds.
- Variation Step: If using the optional citric acid, lightly dust the finished gummies with it right before serving for a sour candy experience.
Notes
- Texture Check: These gummies are much firmer than standard dessert gelatin due to the high ratio of unflavored gelatin. This allows them to stay solid at room temperature.
- Safety Note: Be very careful when handling the boiling water and the hot gelatin mixture to avoid burns.
- Storage: Store in an airtight container in the refrigerator for up to 2 weeks. They can also be frozen for long-term storage (up to 6 months).
- Batch Sizing: This recipe is for a single flavor batch. To make multiple flavors like the original photo, simply repeat the process with different boxes of sugar-free gelatin.
- Allergy Alert: Check your gelatin packaging; while naturally gluten-free, some facilities may process wheat. This recipe contains no dairy, nuts, or eggs.
Nutrition Facts (per serving): Calories: 45 kcal | Total Fat: 0 g (Saturated Fat: 0 g) | Cholesterol: 0 mg | Sodium: 110 mg | Total Carbs: 1 g (Fiber: 0 g, Sugars: 0 g, Net Carbs: 1 g) | Protein: 6 g
These values are approximate and may vary based on ingredients and preparation.
- Prep Time: 5 minutes
- Category: Snack / Dessert
- Cuisine: American